
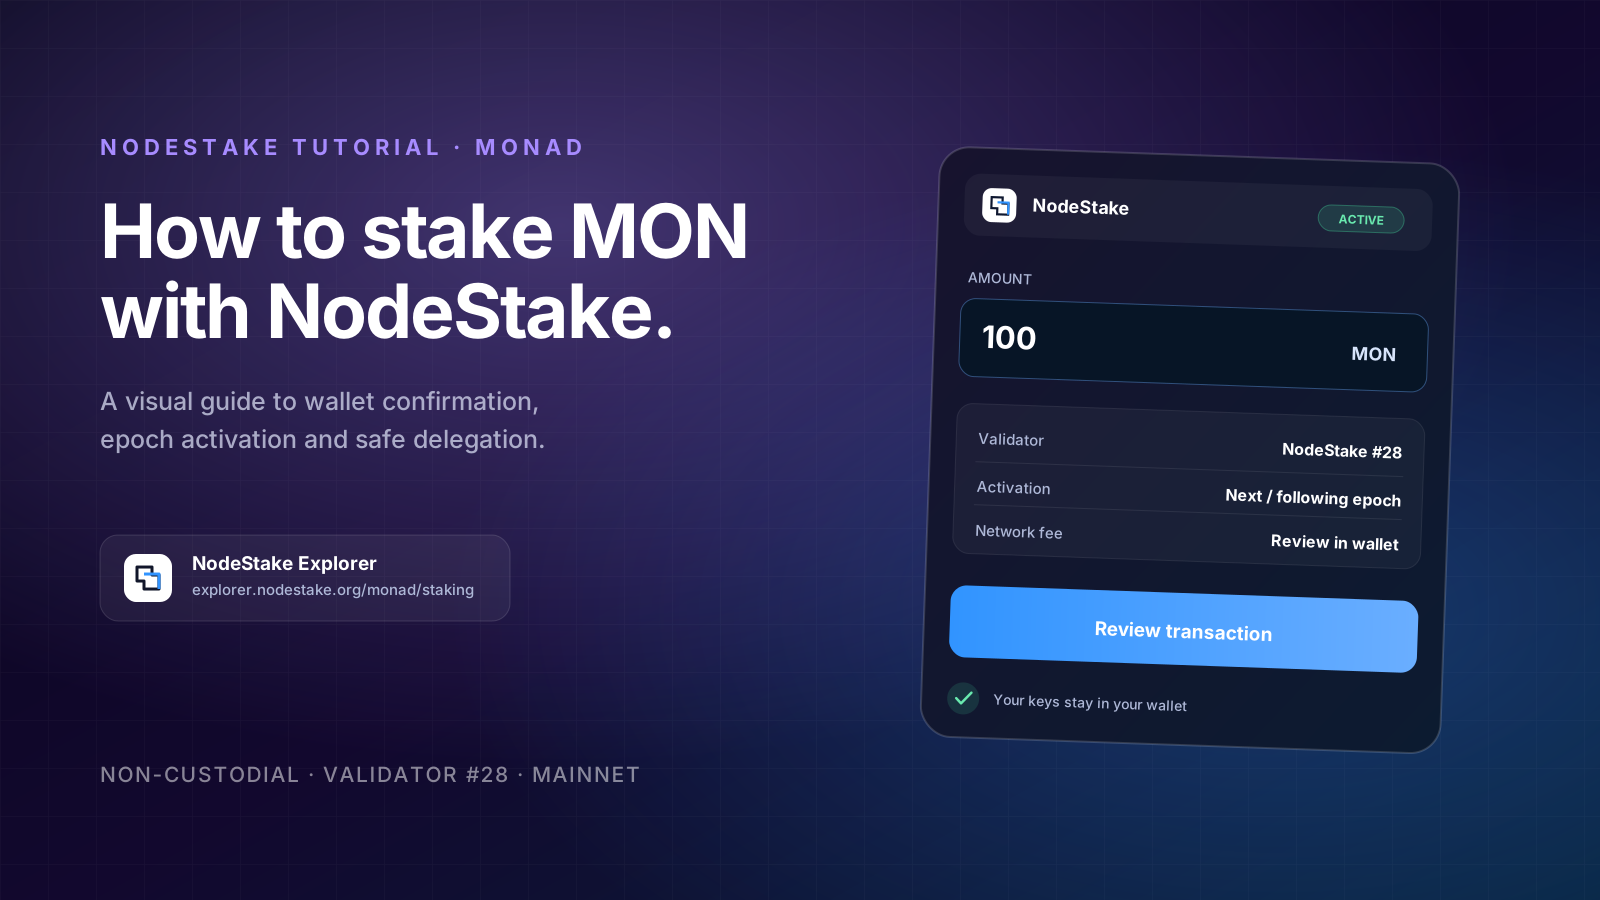
NodeStake Explorer lets you compare Monad validators and stake MON from the same interface. This guide walks through a non-custodial delegation to NodeStake, then explains the part that is easiest to miss: a successful wallet transaction and an active stake are separate states on Monad.
Quick link: https://explorer.nodestake.org/monad/staking — always verify the domain, network and validator before you sign.
The screenshots in this guide were captured from Monad mainnet on August 28, 2026. Rank, voting power, commission, APR estimates, epoch number and other live values can change. Use the current Explorer screen and your wallet confirmation as the source of truth for the transaction you are about to sign.
Video walkthrough
Before you start
- Use a compatible wallet shown by NodeStake Explorer. If you use Keplr, unlock the extension before connecting.
- Hold enough MON for the amount you want to delegate and keep a small amount unstaked for network fees.
- Open the exact Monad staking page at https://explorer.nodestake.org/monad/staking before continuing.
- Never enter a seed phrase or private key into Explorer. The site prepares the transaction; your wallet reviews and signs it.
Step 1 — Open Monad Staking
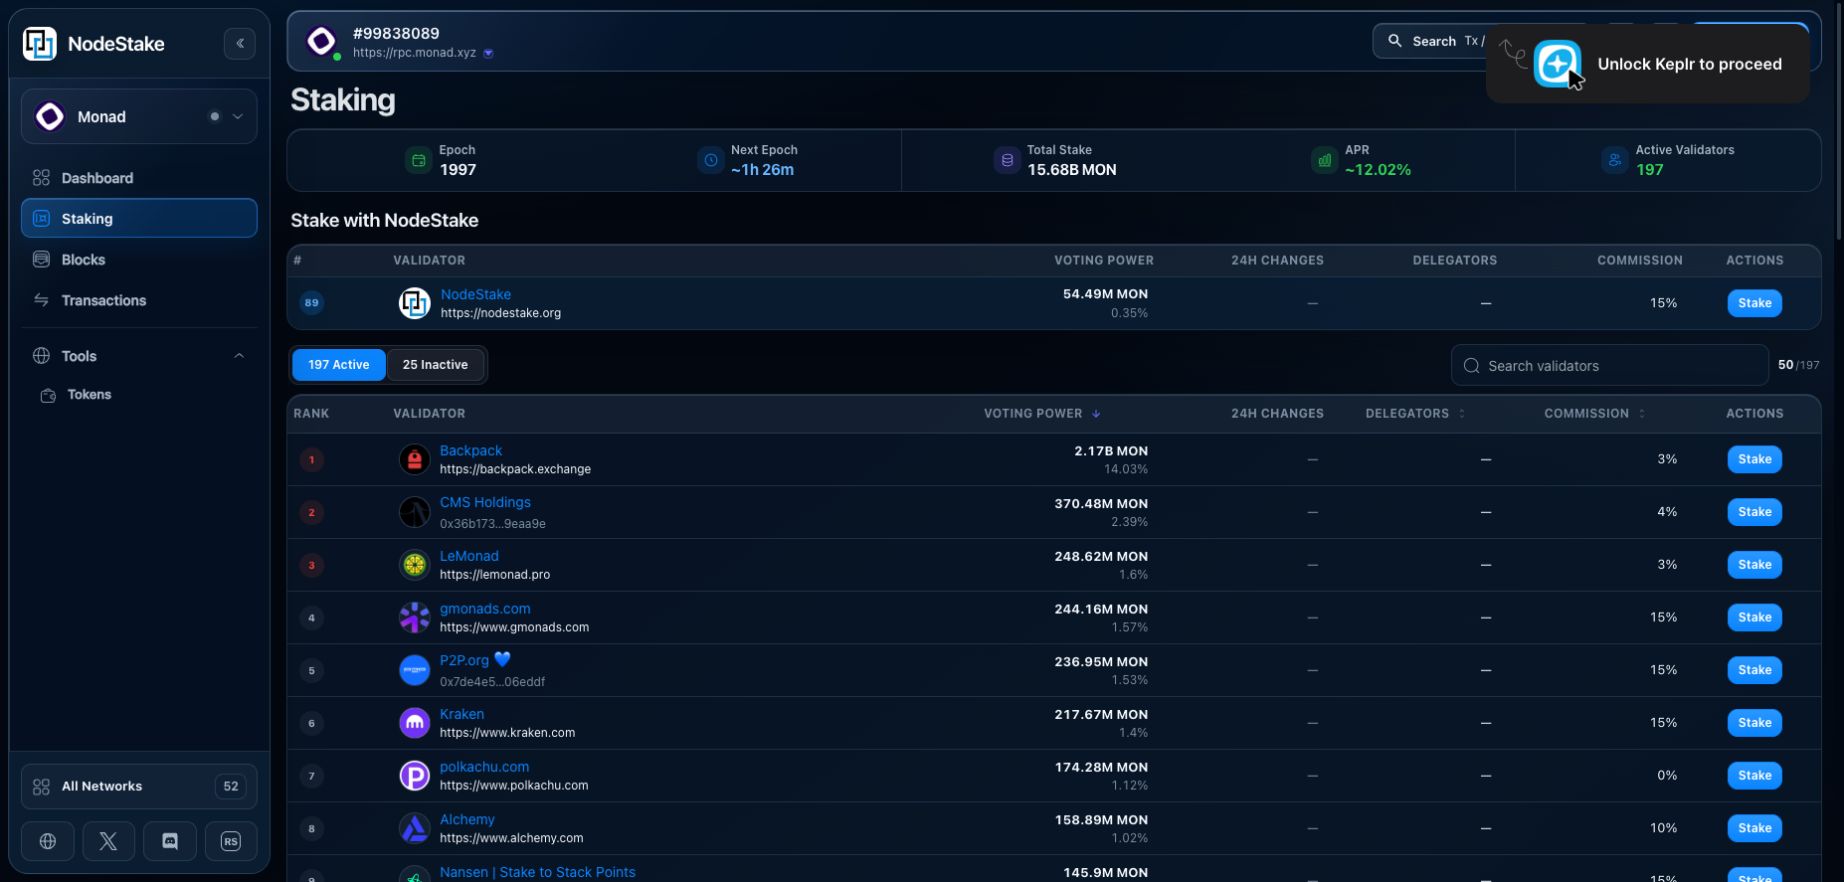
Open Monad Staking at https://explorer.nodestake.org/monad/staking and verify that the network selector shows Monad and mainnet chain ID 143. The page displays the current epoch, live network staking data and the active and inactive validator sets.
NodeStake is also pinned in the “Stake with NodeStake” panel near the top, so you do not need to rely on a changing rank. Open the validator directly via https://explorer.nodestake.org/monad/staking/28 before you continue.
Step 2 — Check the validator before connecting
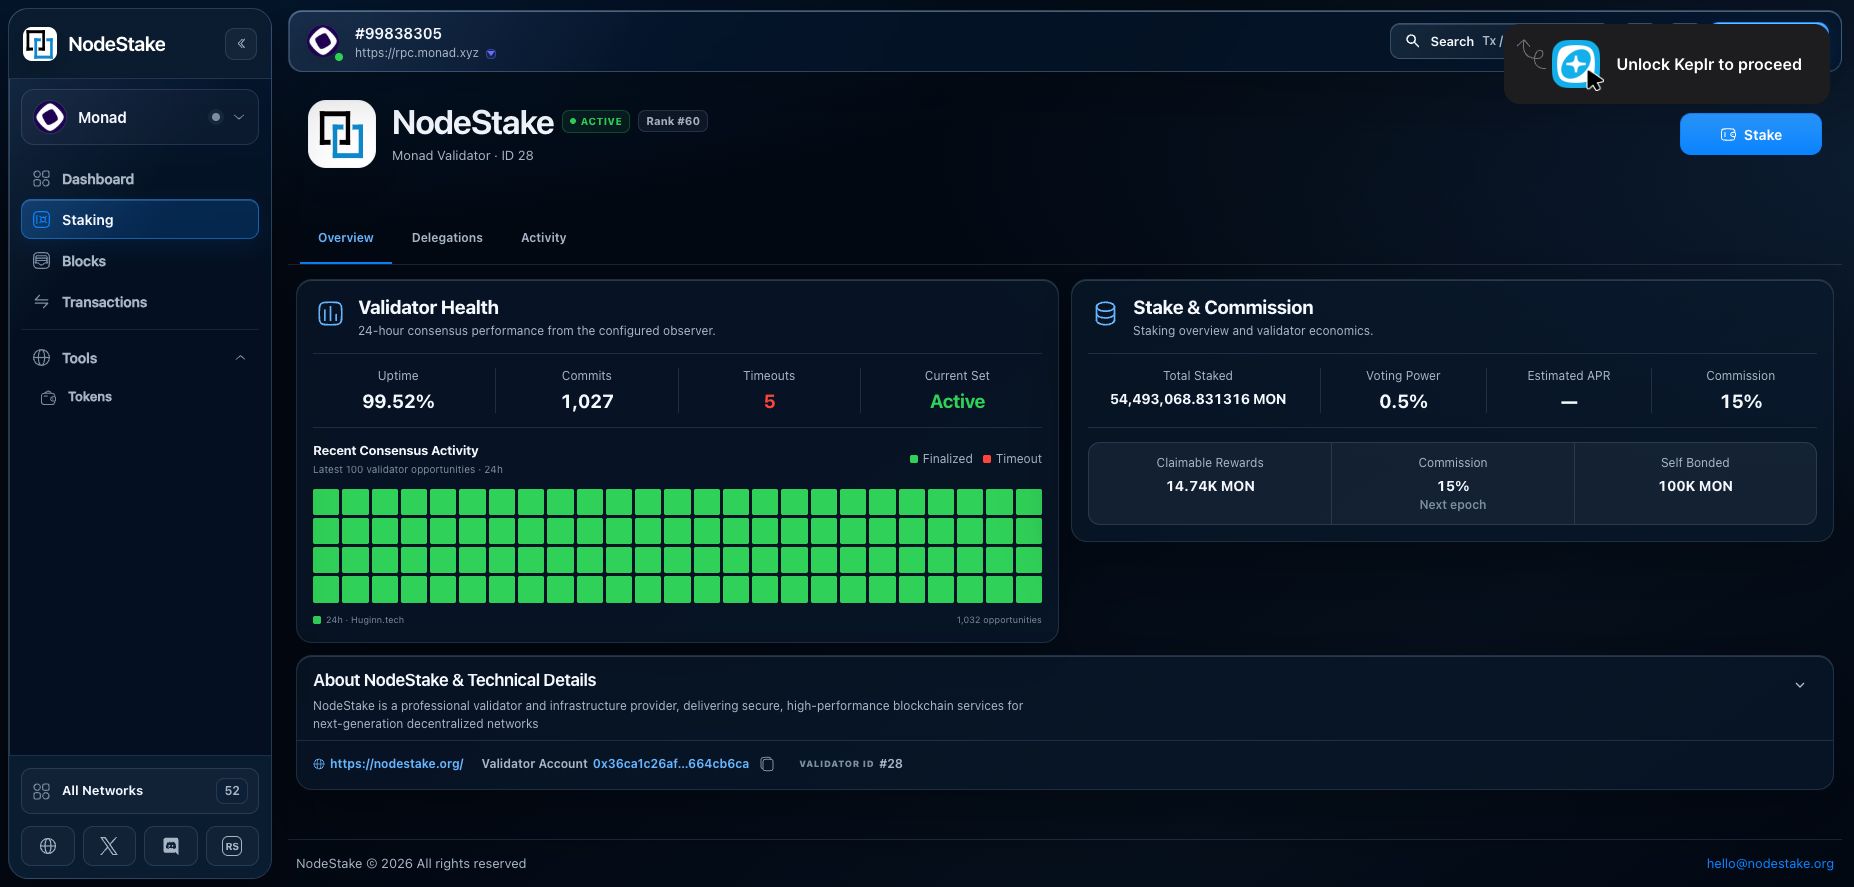
Open the NodeStake validator page and verify the stable identifiers, not only the logo or display name. The page should show NodeStake, Monad Validator ID 28 and the official website at https://nodestake.org alongside recent consensus activity and current validator economics.
- Validator name: NodeStake
- Monad validator ID: 28
- Official website: https://nodestake.org
- Direct Explorer page: https://explorer.nodestake.org/monad/staking/28
Commission, rank, stake and observed performance are not permanent constants. Read the current values immediately before delegating. An APR shown in Explorer is an estimate based on available on-chain data, not a guaranteed return.
Step 3 — Connect your wallet
Select Connect Wallet or Reconnect and choose the compatible wallet offered by Explorer. Unlock the wallet if prompted, approve only the connection to explorer.nodestake.org, and confirm that the selected account is the one holding your MON.
Connecting a wallet does not stake anything. It only lets Explorer read the public account and prepare transactions for your wallet to review.
Step 4 — Enter the amount
Select Stake on the NodeStake row or validator page. The staking form should identify NodeStake and Validator #28. Enter the amount of MON you want to delegate, but do not use your entire liquid balance: you will still need MON for the staking transaction and future claim, compound, undelegate or withdraw transactions.
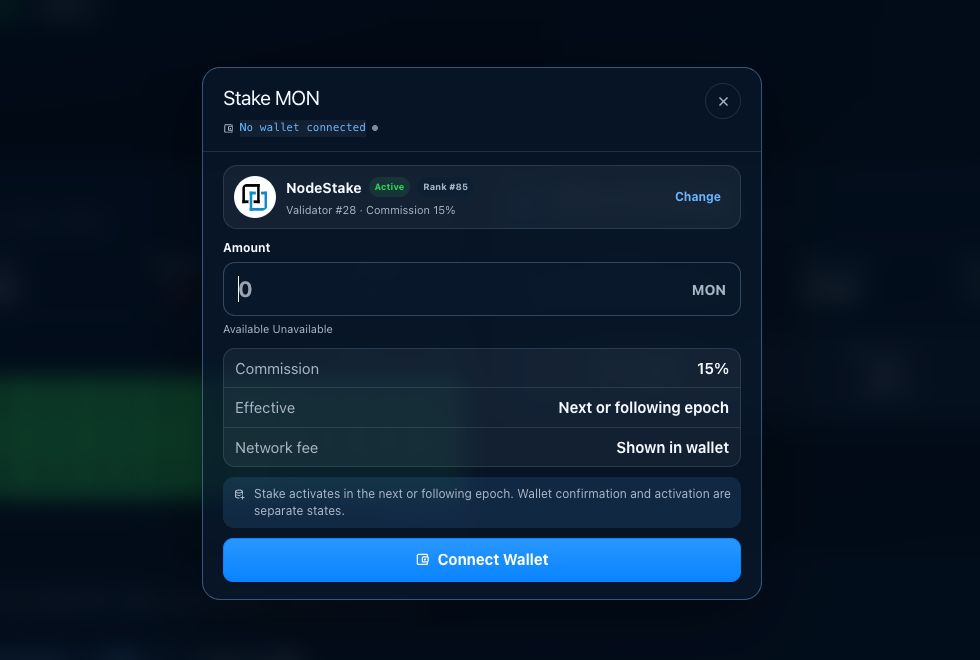
Step 5 — Review and sign in your wallet
Continue to the wallet review. Check the requesting site, Monad mainnet, the validator, the MON amount and the network fee. Reject the request if any field is unexpected. When everything matches, confirm the transaction in your wallet.
NodeStake does not receive your seed phrase or take custody of your wallet. Your wallet signs a transaction that calls Monad's staking system; Explorer is the interface that helps you construct and inspect that action.
Step 6 — Verify the transaction, then verify activation
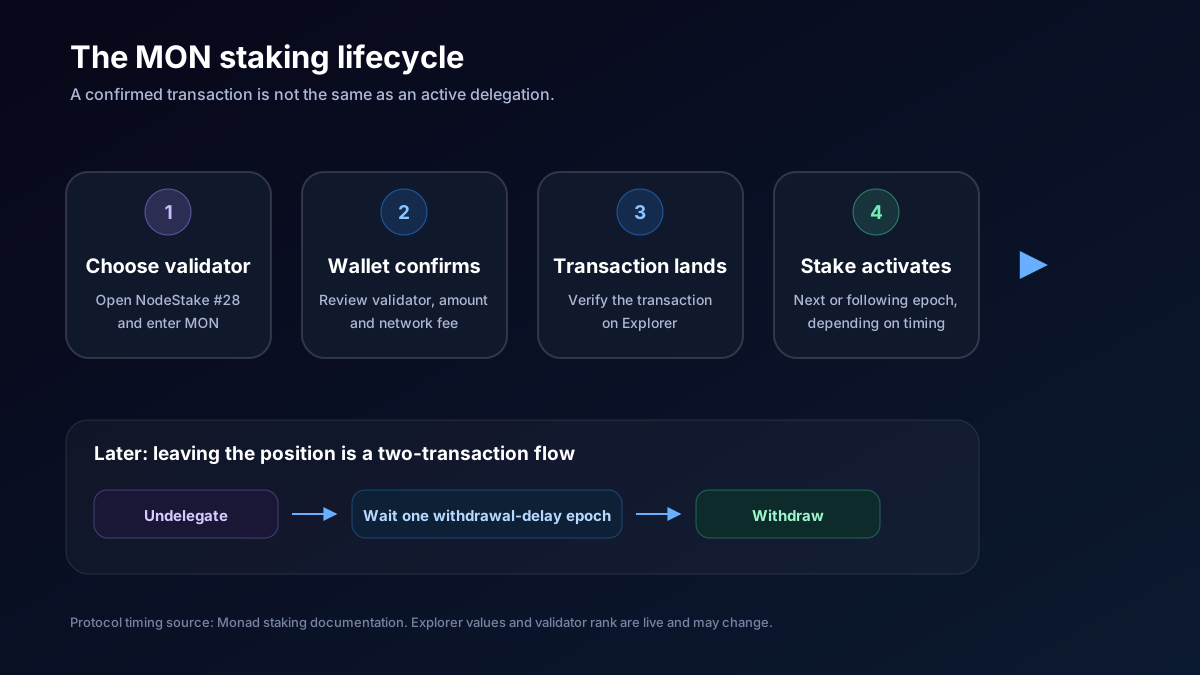
After signing, wait for the transaction to be included and open its hash in Explorer. Confirm that it succeeded and that the sender and staking action match what you intended. This proves the transaction landed, but it may not yet mean the delegation is active.
Monad applies most staking changes at epoch boundaries. According to the official staking documentation, an epoch spans 50,000 blocks — approximately 5.5 hours — and is followed by a 5,000-round delay period. A delegation submitted before that delay normally activates in the next epoch; one submitted during the delay activates in the following epoch.
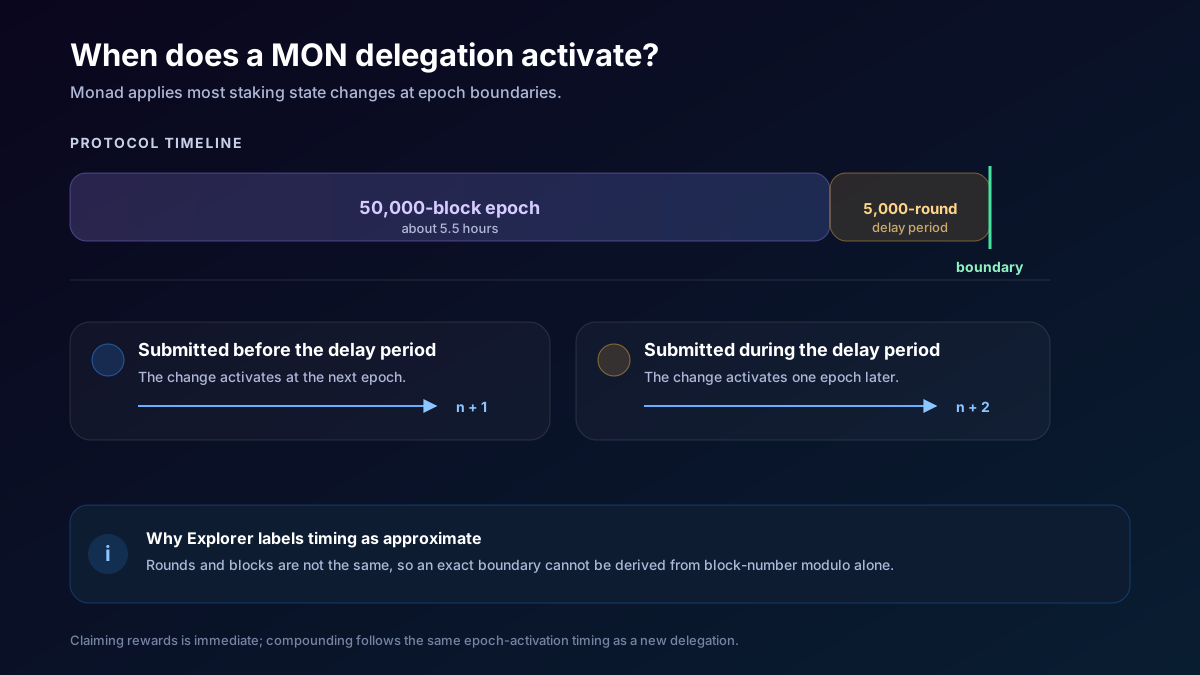
Return after the relevant boundary and confirm that the position is shown as active for NodeStake. Keep the transaction hash until both the on-chain transaction and the activated position have been verified.
Rewards: claim or compound
Claiming and compounding are different actions. Claim sends available rewards to your liquid wallet balance and is immediate once its transaction succeeds. Compound adds rewards back to your stake; like a new delegation, that increase becomes effective at an epoch boundary under the same timing rules.
- Claim when you want rewards to remain liquid in your wallet.
- Compound when you want rewards added to the delegated position.
- Review the wallet fee and verify each resulting transaction independently.
Unstaking is not the final withdrawal
On Monad, leaving a staking position is a two-transaction process. First submit an undelegation. After the protocol's one-epoch withdrawal delay has passed, submit a separate withdraw transaction to move the MON back to your liquid balance.
- Submit Undelegate and verify that transaction succeeded.
- Wait until the withdrawal delay has elapsed.
- Submit Withdraw and verify both the transaction and your refreshed liquid balance.
An undelegation receipt or countdown is not proof that the MON has returned to your wallet. The process is complete only after the withdrawal transaction succeeds and the updated balance is visible on-chain.
Troubleshooting
The wallet will not connect
Confirm that the wallet is unlocked, refresh the page, and reconnect from the Explorer header. If you have multiple wallet extensions, check which one opened and which account it selected.
The stake transaction succeeded but the position is pending
That can be expected. Check whether you submitted before or during the epoch delay period, then wait for the next applicable boundary and refresh the position.
The displayed APR or rank changed
Those are live measurements, not fixed terms. Validator stake, network totals, block rewards, commissions and set composition can change over time.
The wallet shows an unexpected validator, amount or network
Do not sign. Close the request, return to the verified Explorer URL and rebuild the transaction from the NodeStake Validator #28 page.
Official references
- NodeStake Explorer — Monad Staking: https://explorer.nodestake.org/monad/staking
- NodeStake Validator #28: https://explorer.nodestake.org/monad/staking/28
- Monad staking overview and epoch timing: https://docs.monad.xyz/reference/staking/overview
Staking involves protocol, validator, market and smart-contract or interface risk. This guide is educational and is not financial advice.